Fixing a failing control
One control, end to end: open it from Audit Readiness, describe the implementation in the guided policy fields, attach typed evidence on both the documentation and implementation sides, and confirm the CCB maturity score.
The short version
Open Audit Readiness, expand a failing control, click Upload evidence. On the control page, fill the guided fields in the page body to describe how the control is implemented, then attach typed artifacts on both sides of the Evidence section. The control moves to Ready once every required requirement is filled (or marked N/A with justification).
Step 1 — Pick a failing control
Open the Audit Readiness tab. Start with the Will fail bucket — these are today's non-conformities. Within each bucket, controls are grouped by function (Govern / Identify / Protect / Detect / Respond / Recover). Controls tagged KEY carry the most weight at audit.
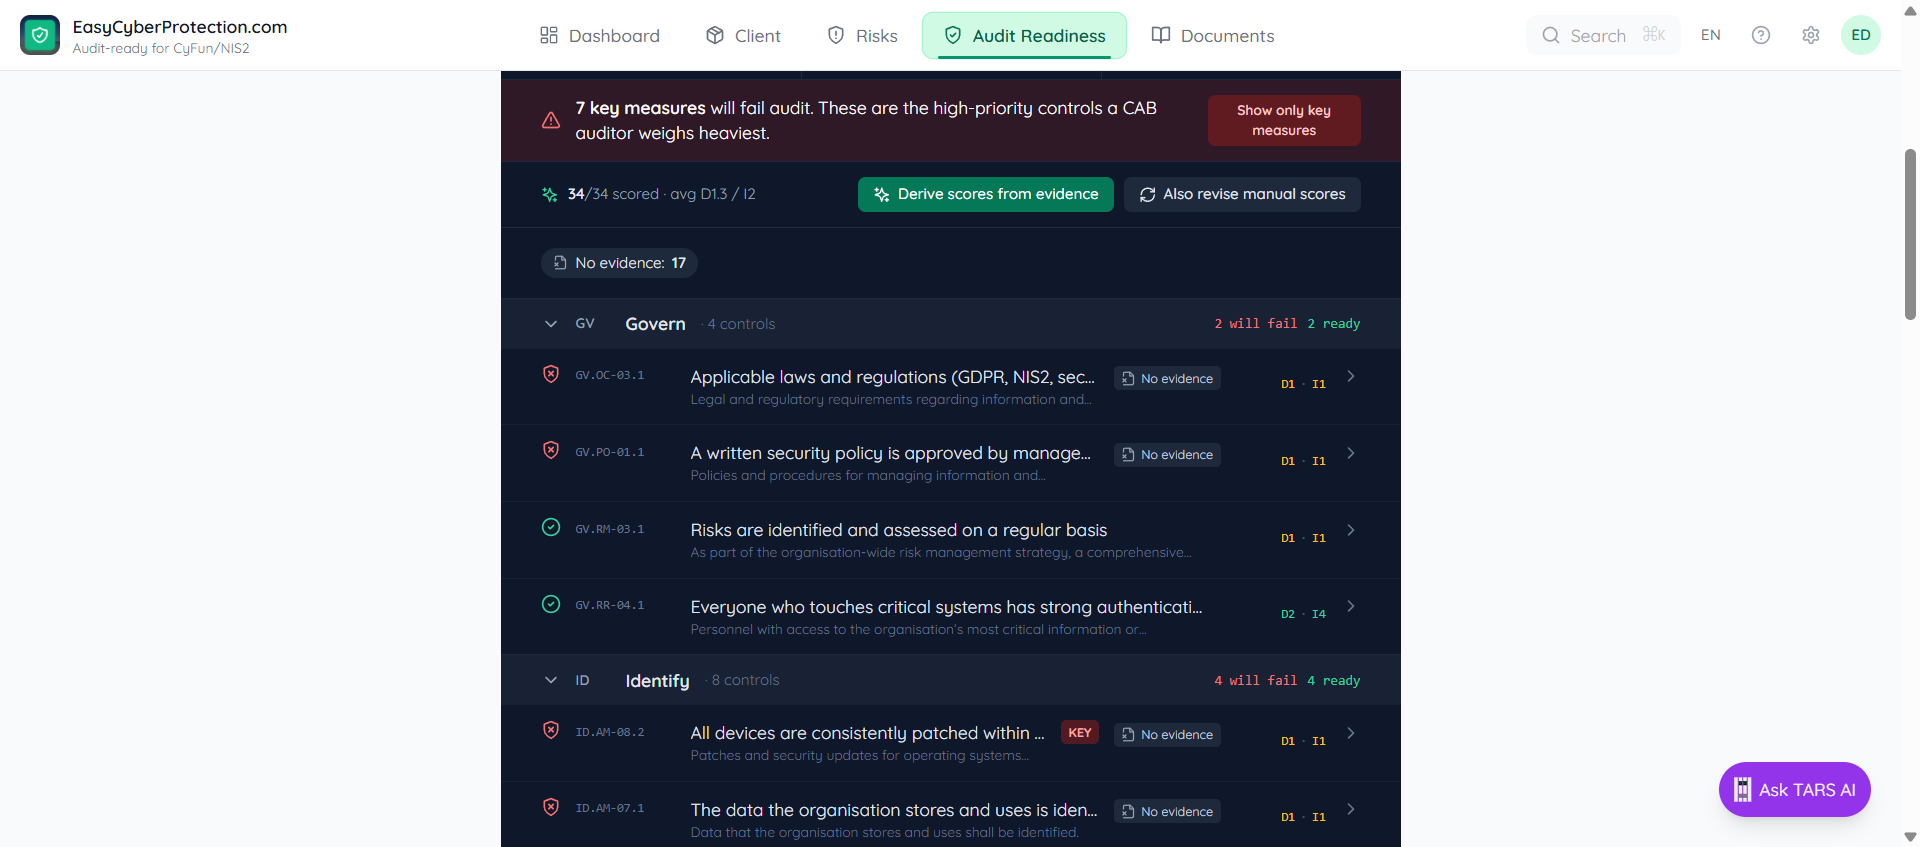
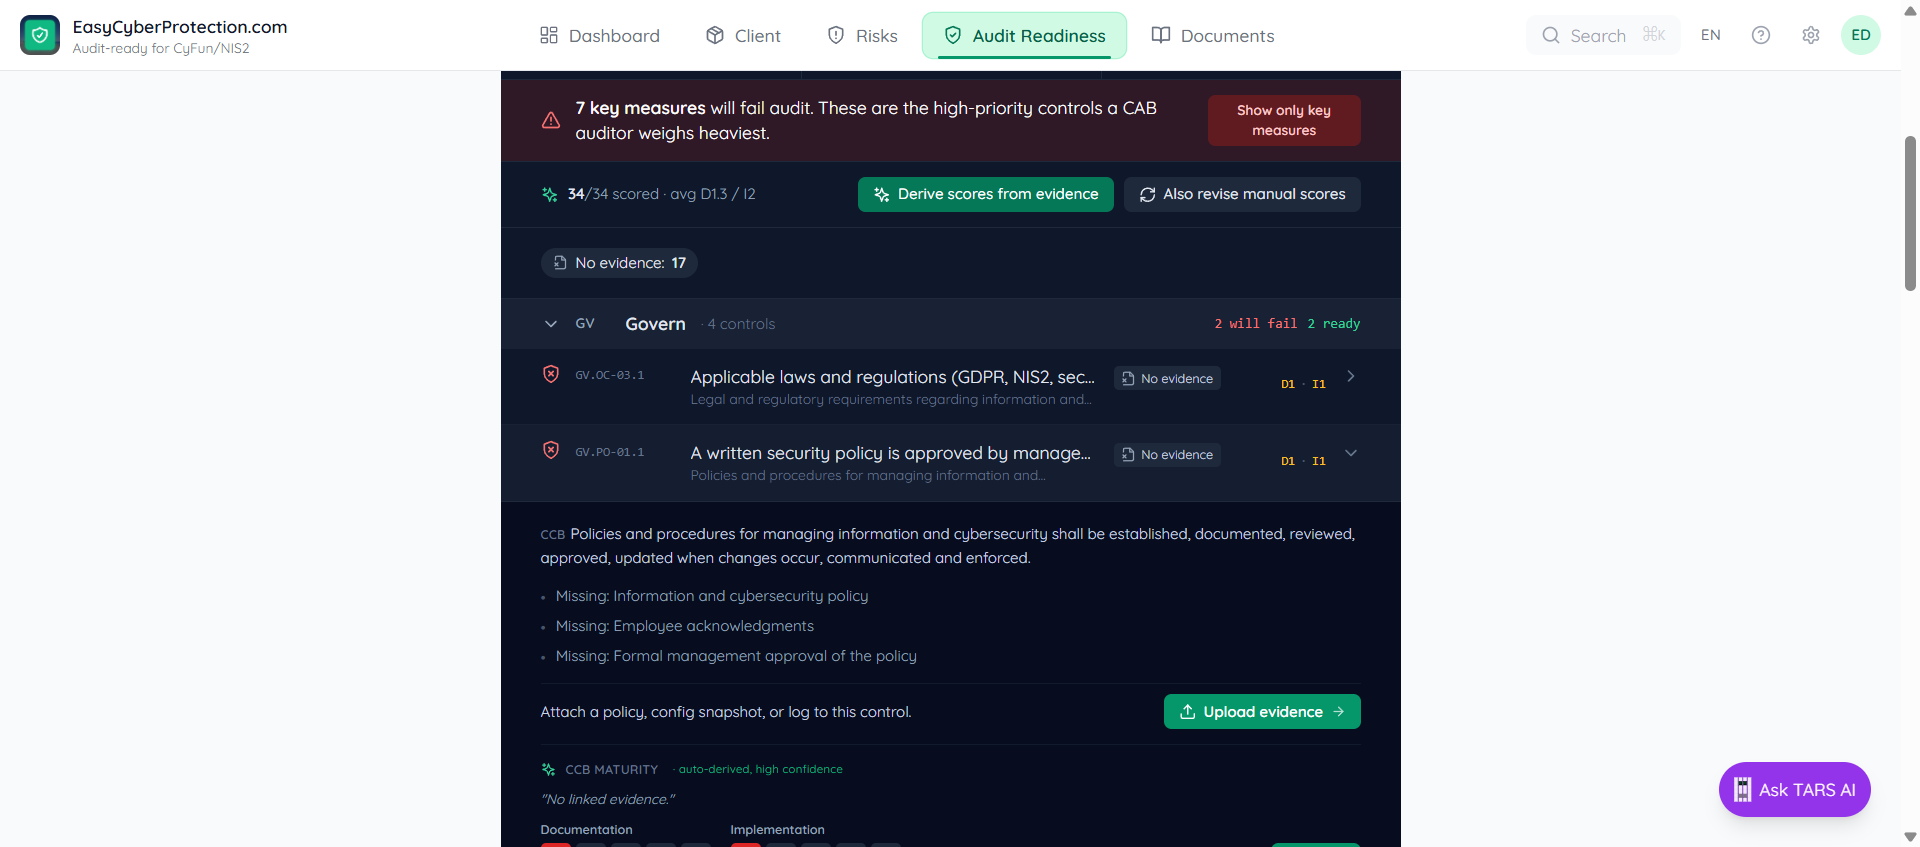
Step 2 — Expand to see what's missing
Click a control row. The expanded panel lists the CCB shall-statement, the specific requirements that are missing, and an Upload evidence link. The CCB maturity panel below shows the current D and I scores — often D1/I1 for a control with no evidence yet.
Step 3 — Fill in the guided policy fields
The control page opens with a breadcrumb (Documents → controls → cyfun-basic → …), the CCB reference as a heading, and the policy prose below. Where the template has blanks, you'll see guided fields — select dropdowns, text inputs, date pickers — each tagged with the control(s) it satisfies and a scope button.
Fill a field and click Save. The value appears in read-mode with a scope label. Use Add another if different groups use different tools (HQ uses Veeam, the remote office uses Acronis) — each scoped value is tracked independently.
Step 4 — Attach evidence on both sides
Scroll to the Evidence section. It splits into two columns — Documentation (what we say we do) and Implementation (what we actually do). Each lists the template requirements with a counter (0/1, 0/2) and an [+ attach evidence] button per row.
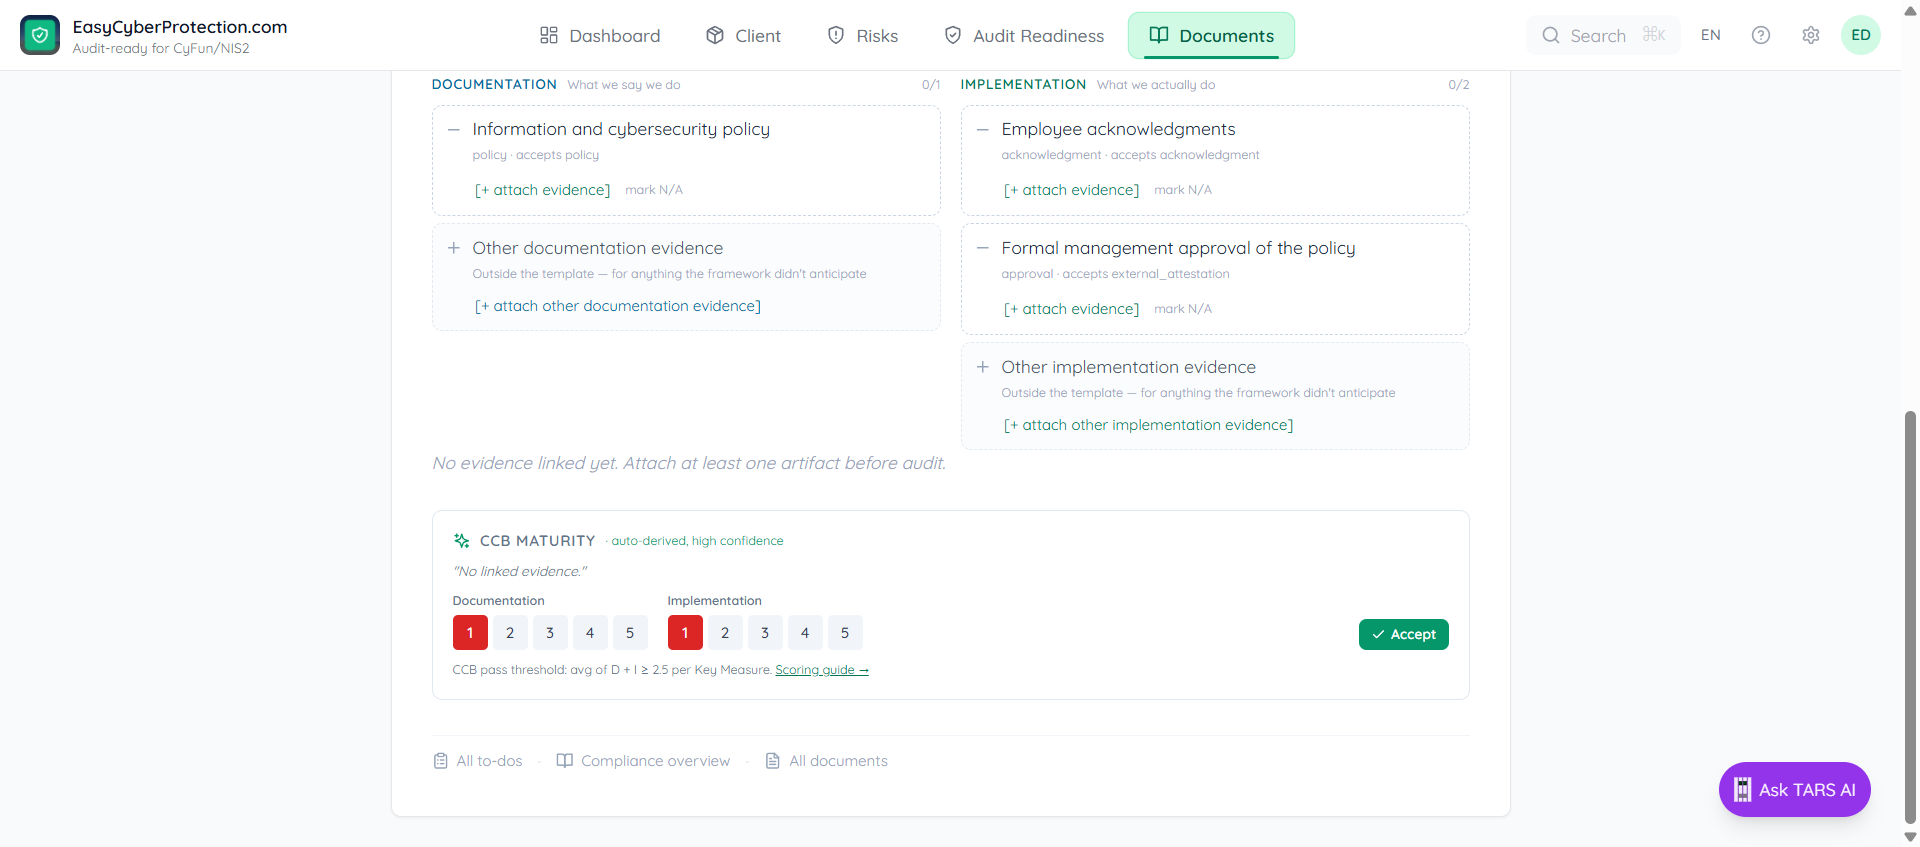
Click [+ attach evidence], pick from wiki pages, file upload, or external URL. Where a requirement genuinely doesn't apply, click mark N/A and enter a short justification. For evidence that's relevant but outside the template, use the Other documentation/implementation evidence row at the bottom of each column.
Full walkthrough: Attach evidence.
Step 5 — Confirm CCB maturity
Back on Audit Readiness, re-expand the control. ECP re-derives D and I from the new evidence. Click Accept to lock in the suggested score, or override the 1–5 buttons manually.
The CCB pass threshold is average of D + I ≥ 2.5 per Key Measure. Once every required requirement is filled and the D/I scores pass, the control moves to Ready and the readiness percentage updates immediately.
After a bulk upload (e.g. a Microsoft 365 sync) use the Derive scores from evidence button at the top of Audit Readiness to recompute D/I across every control in one shot.