Adding and Onboarding a Client
Create a client workspace, run the CyFun assessment, and provision the compliance framework.
Create the workspace
From your Partner Dashboard, click + Add client. Enter the company name and select the client's language — Nederlands or Français. This sets the language for the client's platform UI.
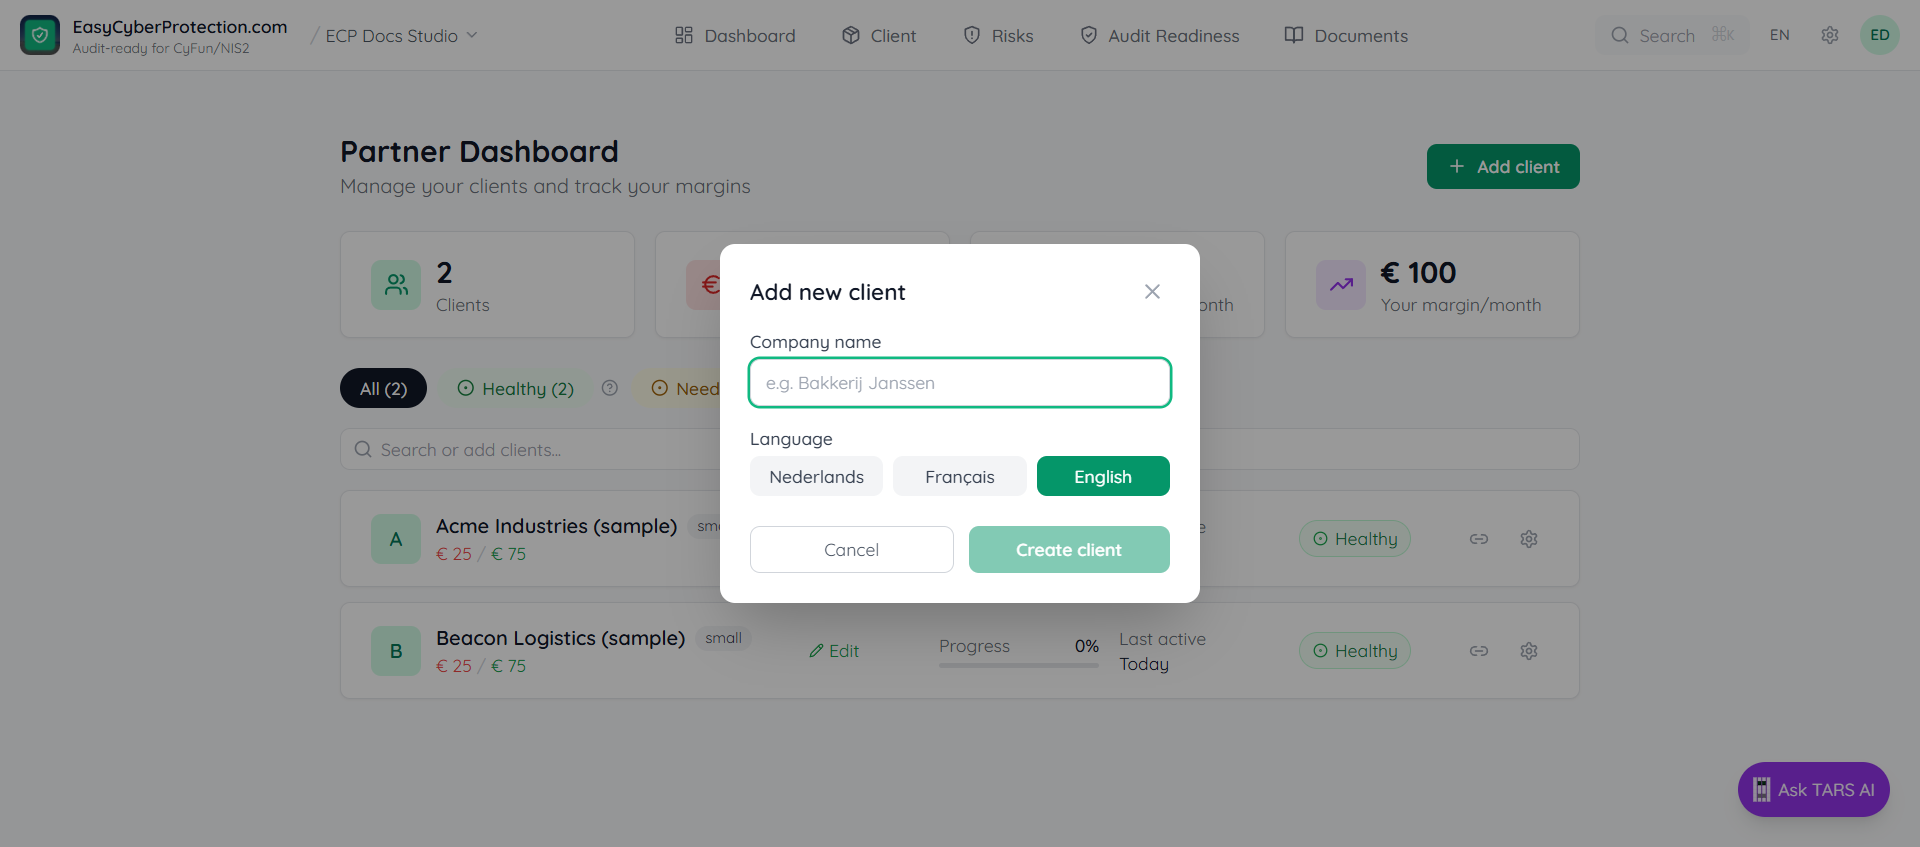
The workspace is created immediately. You manage it on behalf of the client. To give the client direct login access, invite them via the Access tab once the workspace is set up — or copy the self-serve join link from the client row on the Partner Dashboard.
Open the client workspace
Click the client name in your dashboard to open their workspace. The home page shows the current compliance score and a list of focus tasks to complete.
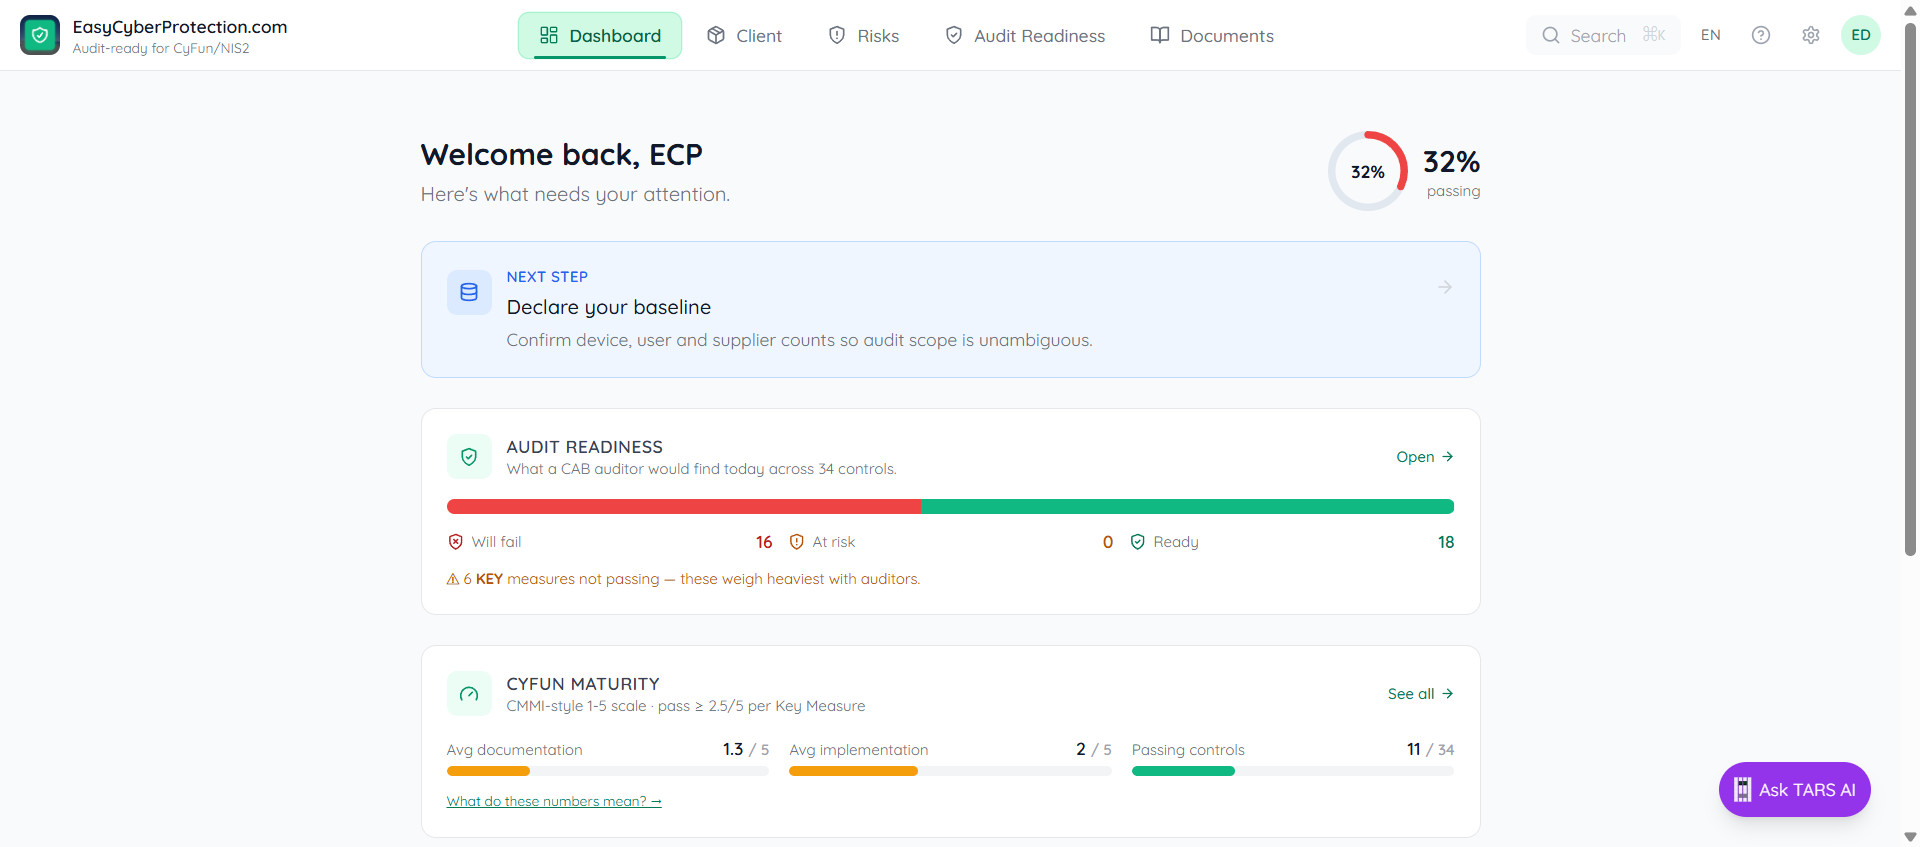
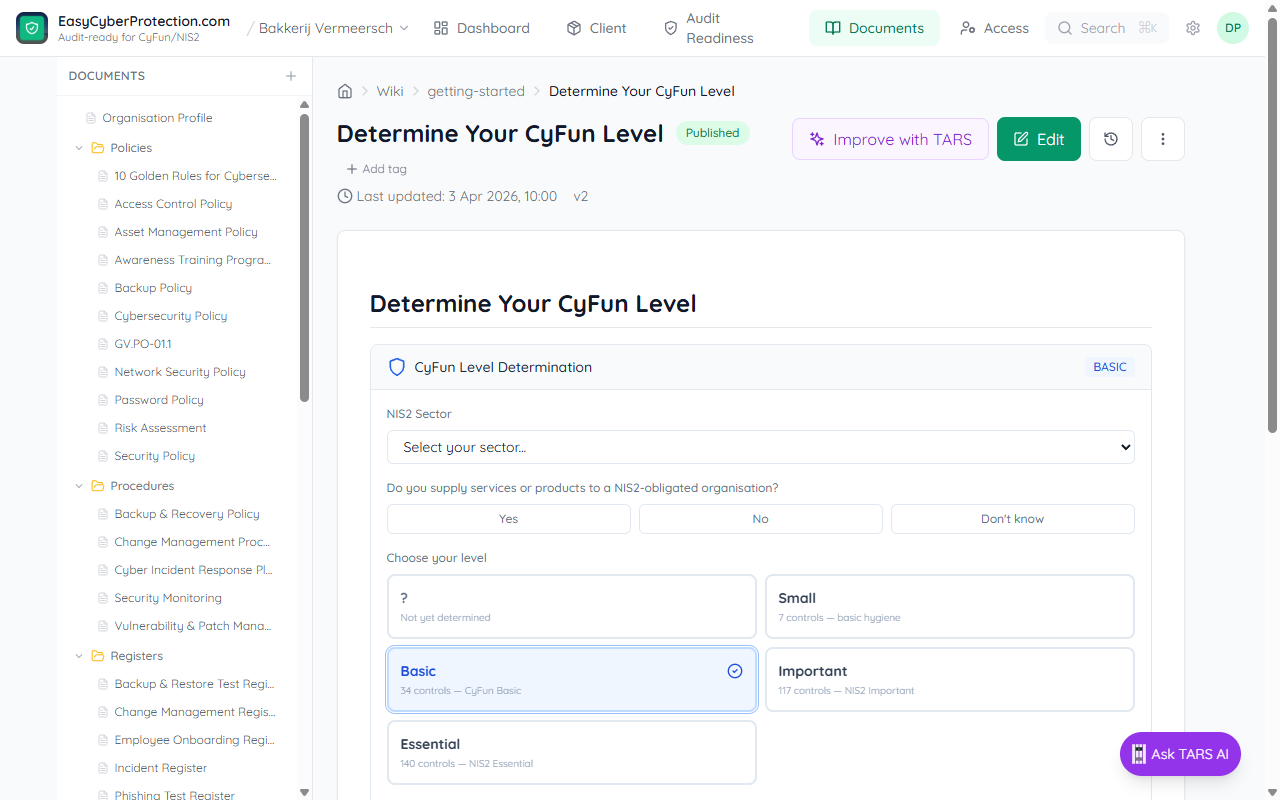
Run the CyFun Level Assessment
Newly-created workspaces start with framework_id='TBD' — no framework, no pages. Click the Next step card on the Dashboard to open the CyFun Level Assessment (Documents → Assessments). It determines the right tier based on:
- Number of employees
- Sector (essential / important under NIS2)
- Whether personal data is handled
- Current IT setup
The four possible tiers are Small, Basic, Important, and Essential. Pick the one the assessment suggests and click Apply this level — provisioning runs in about 10 seconds.
What provisioning creates
CyFun Basic creates 34 controls across six functions — Govern (4), Identify (8), Protect (15), Detect (4), Respond (2), Recover (1) — plus the full set of policies, procedures, registers, plans, and assessments under Documents. You'll see them in the Documents tree and as grouped rows on Audit Readiness.

The client can start working immediately. The Partner's next task is importing devices and employees so the asset register is populated.