Quick Start: Onboard Your First Client
From login to a fully provisioned client workspace in about 15 minutes.
What you'll do
- Log in to your partner dashboard
- Create a client workspace
- Complete the CyFun assessment to activate the framework
- Import the client's devices and employees via CSV
- Walk the client through their first controls
Log in as partner
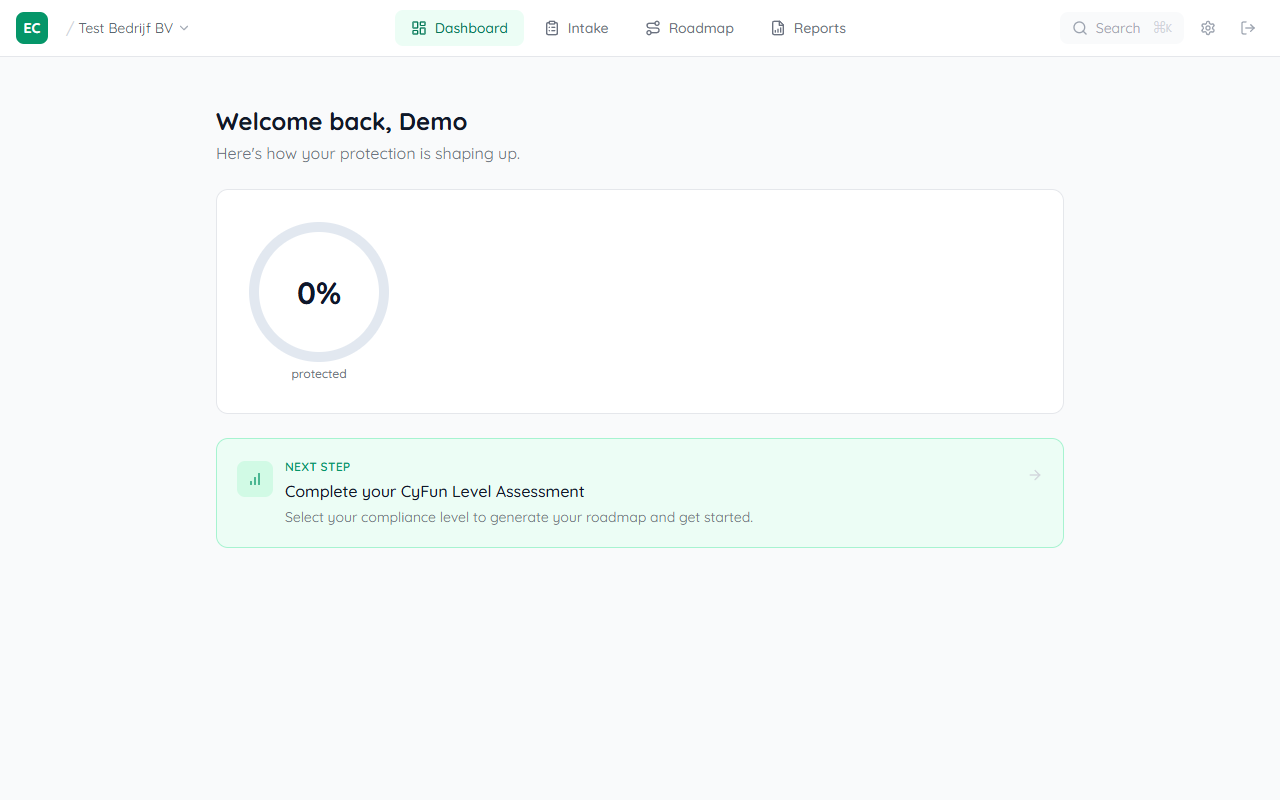
Go to easycyberprotection.com/login and sign in with your partner account. You'll land on the Partner Dashboard showing your client portfolio.
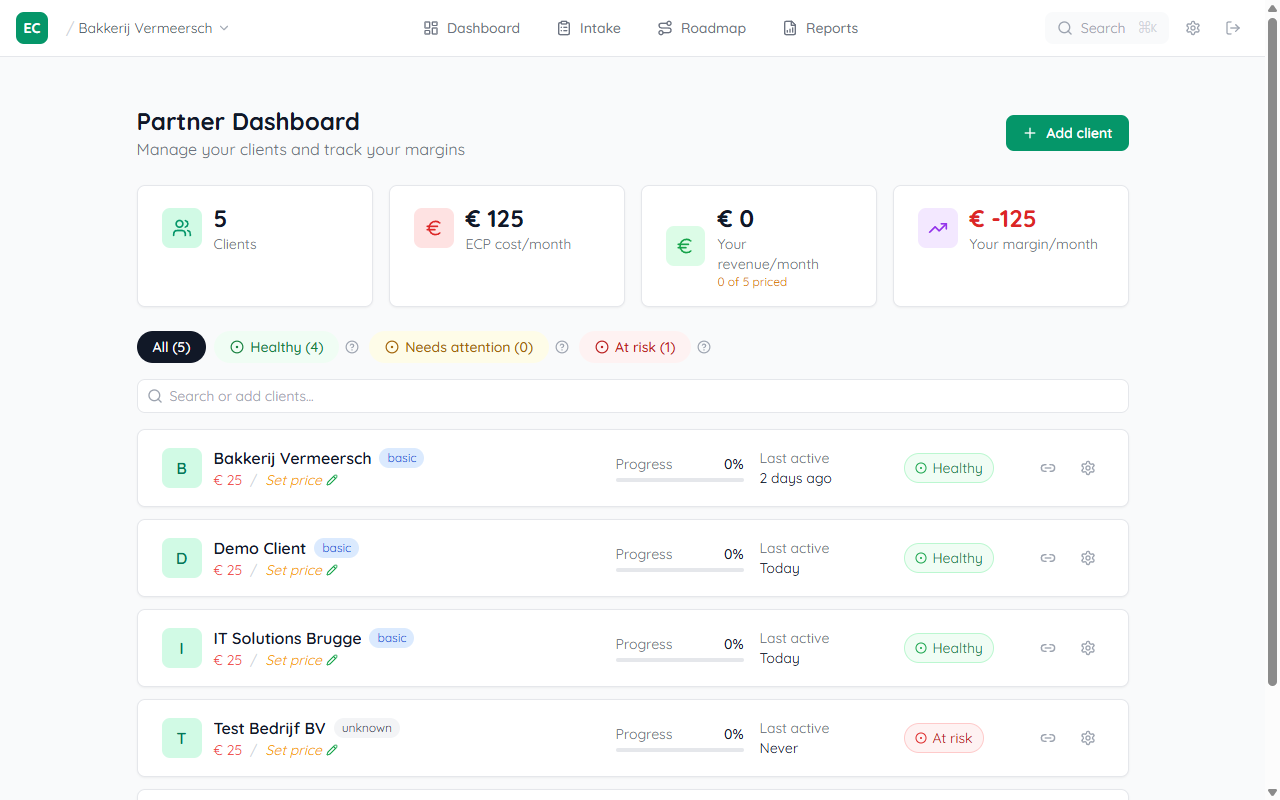
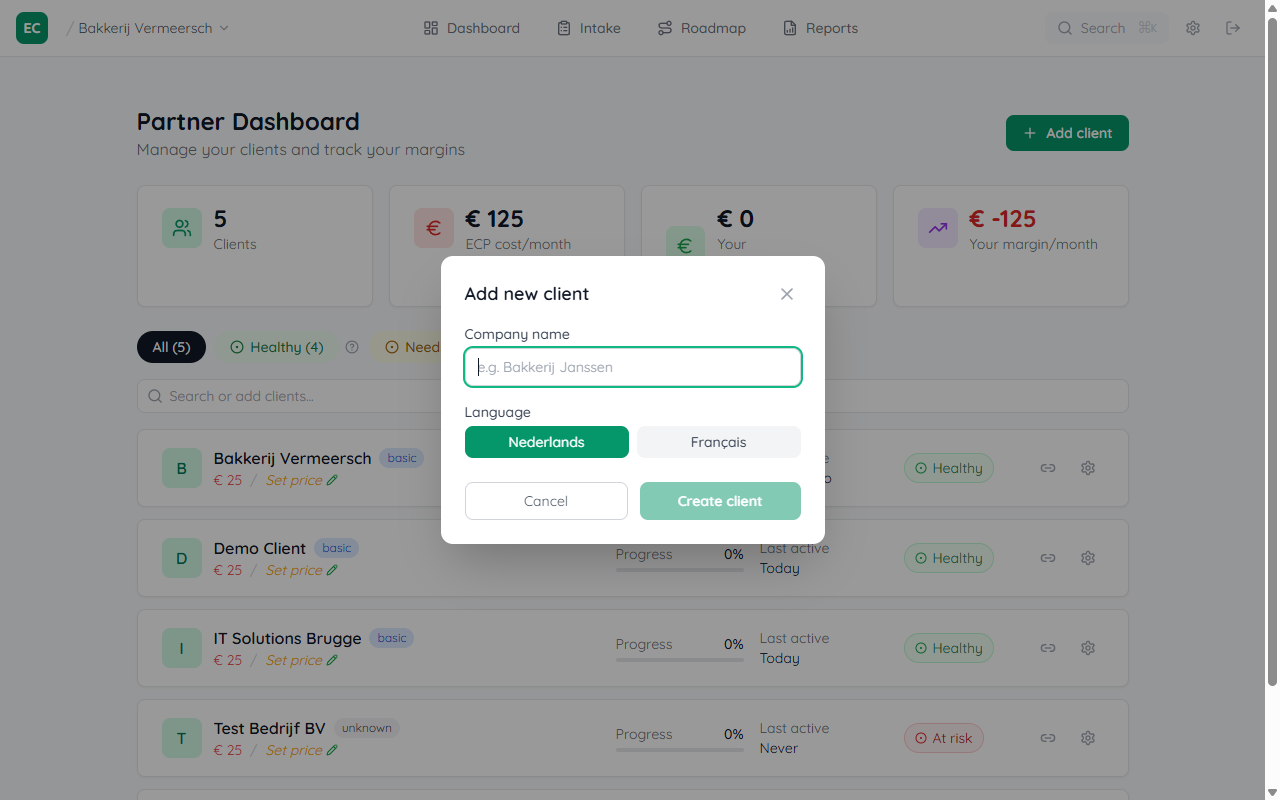
Add a new client
Click Add client in the top-right of the dashboard. Enter the client's company name and preferred language (NL/FR/EN). A workspace is created instantly.
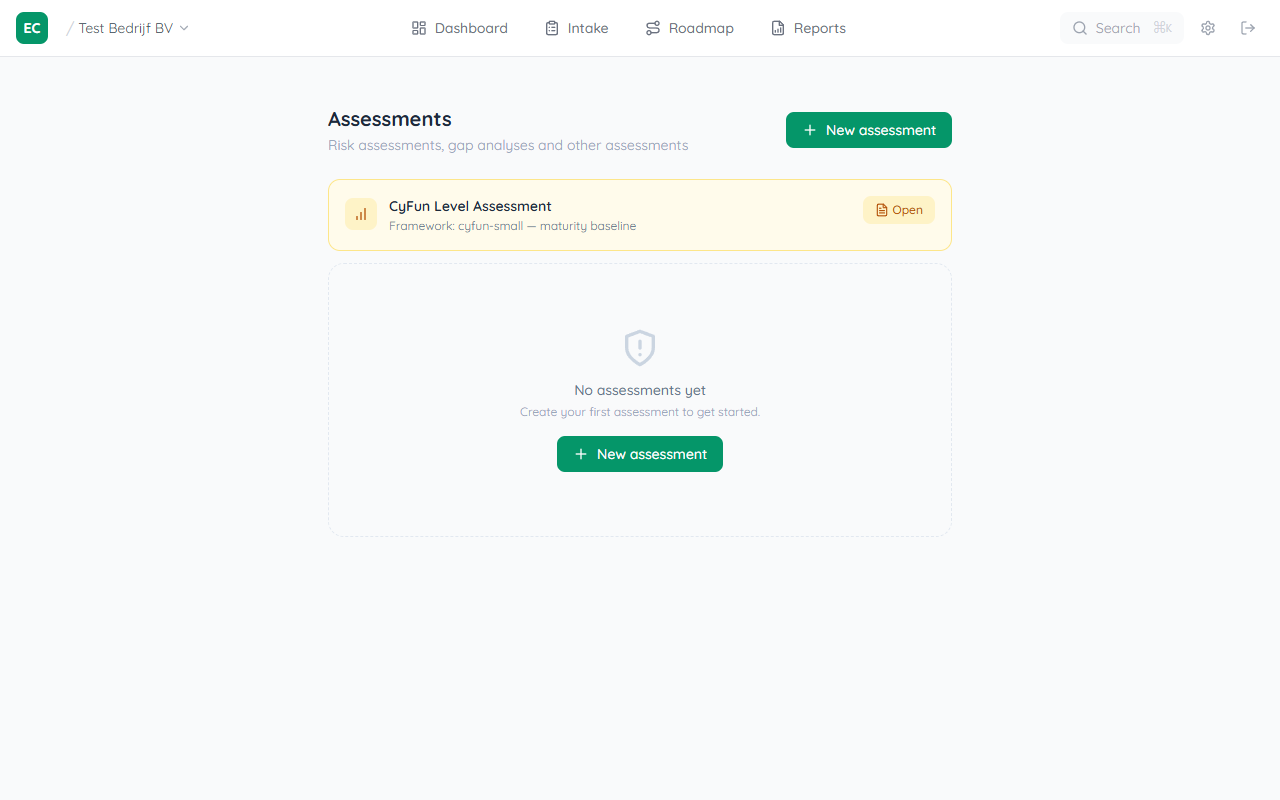
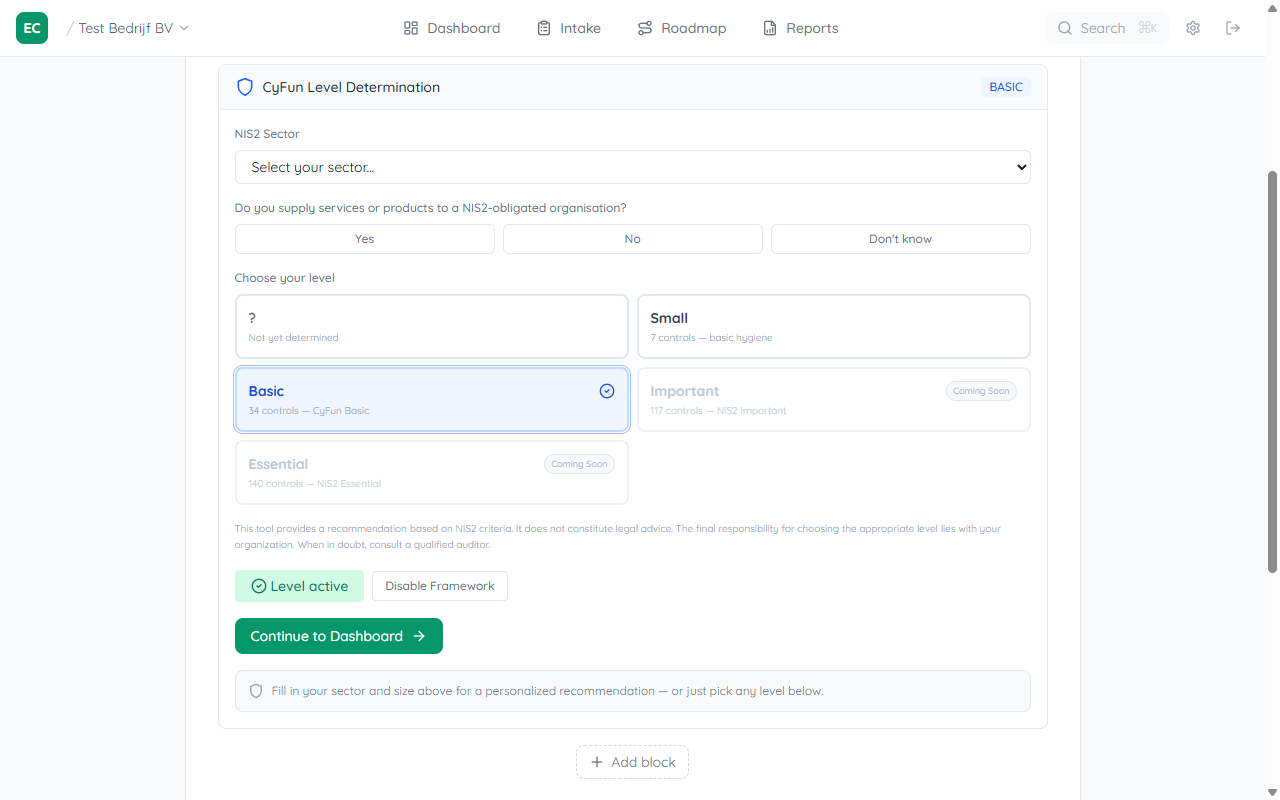
Complete the CyFun Level Assessment
After creating the client, click the Next step card on the dashboard — it takes you straight to Assessments. Open the CyFun Level Assessment, select the client's level (Small or Basic based on their size and sector), then click Apply this level.
Import devices and employees
Go to Intake → Assets and click Import entities. Drop the client's asset spreadsheet and the importer auto-detects column types, showing a preview before uploading.
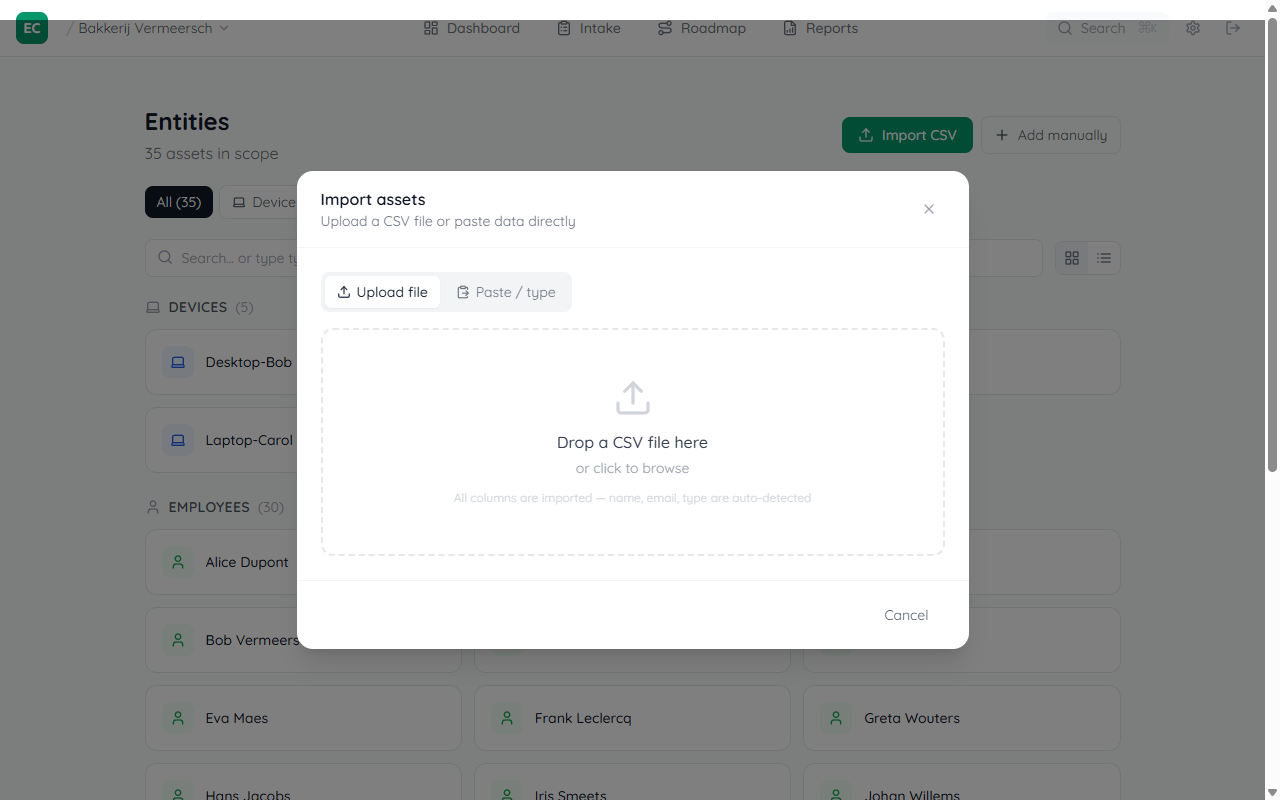
See the full guide: Importing devices and employees →
Your roadmap is ready
Back on the Dashboard, the client now sees their score ring and a Next up card showing the highest-priority action. The Roadmap tab lists all items grouped by effort (Quick wins / This month / Later). Click any item to see guidance and track status.